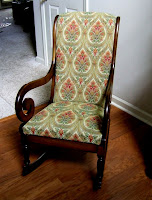
Before After
 Here are some before and after shots to peak your interest.
Tools you will need:
-staple gun and staples
-needle nose plyers
-flat head screw driver and any other screw driver needed to remove cushions
-small hammer
-bandages (ha, ha)
-enough fabric to cover the cushion and wrap underneath
-scissors
The first task is to remove the old fabric. No biggie, just unscrew, remove cushions and start prying up staples. The simplicity of this chair is that the fabric is on two removable cushions. Be very observant as you undo your chair and fabric. Take pictures if necessary so you can figure out how to reassemble the pieces and how the fabric should be applied. You are just copying the previous model.
Once that was done it was a matter of putting the fabric back on and stapling it in place. This chair needed three separate pieces of fabric. The seat and the front of the back cushion were recovered first. Because of the way this chair goes together, I needed the back of the back cushion open to reattach the cushion to the sides. Then for the back of the back, I carefully folded the edges in for a smooth finish and stapled in place. (Stretch and staple) Here are a couple of tutorials:
How to Reupholster a Chair
Classy Clutter: How to reupholster seat covers
I finished the edges with a coordinating gimp to cover staples and a few decorative upholstery nails since they kind of fit the era.
Go on...Give it a try!!!


No comments:
Post a Comment