Monday, August 22, 2011

Do It Yourself Furniture

I grew up in a do-it-yourself family. My grandfathers could do almost anything. Both did woodworking and made beautiful furniture, cabinets and keepsakes. Both made jewelry. They did their own metal work, cut and polished stones and my Grandpa Rounds even hunted for his stones in the desert. They painted their own houses, took care of their own yards, raised some of their own food and handled many household and automotive repairs. Then there's my Dad. He makes and/or refinishes furniture and has been known to refurbish an 80 year old house all by himself. So when it comes to doing things myself, I have a lot of experience to draw from. Plus I like to think there might be some genetic disposition to being successful with DIY and really that's what gives me the courage to try these things. But really, any of us can learn.

Here is my latest DIY. This was my husband's childhood desk. Well used, wouldn't you say?

I had written the thing off but since we just put the household budget on a diet, I decided to suck it up and do the work.

You might think that stripping, sanding and refinishing furniture is quite a chore and you would be right. However, while there is a lot of work involved, it isn't that hard.  Being that I am less than a professional in this line of work, I am not offering a tutorial for furniture refinishing. I simply want you to know that it can be done by the likes of "us". And yes, results are better having it done professionally. If you have a valuable or expensive piece, go professional. Things like this, flea market finds and hand-me-downs, DIY!

Here are the results:


Not bad for an amateur!


Monday, August 8, 2011

Pocket Wall Hanging Tutorial

 Hi! Wow, I haven't blogged in over a week. That would be the week before school starts so I got very little done much less any sewing. But here I am with a tutorial for pocket wall hangings. This is not complicated stuff. It's also not completely original either. There are other tutorials and patterns out there for similar things but I want to show you how easy it is to make these things and to customize them to your needs. This is where you say, "Who needs Pottery Barn?"

It all started with baby slings I was making for my two expectant cousins. Click here  for that great tutorial from My Karma Baby.com. I had leftover fabric and decided to make a few more things to go along. This is my knock-off Taggies bitty-blanky.


So simple. Two pieces of fabric with ribbon loops sandwiched in between. Stitch, turn right side out and top stitch. Done.


The Pocket Wall Hanging is just as simple, it just takes a little more work. I designed mine as a quilt because my left-over fabric was in smaller pieces. Cut fabric squares to equal size and lay them out in a pattern that you like. Stitch the squares of each row together and press seams open. You could opt for larger pieces or strips instead of squares or even one large piece.


Now we are ready to make pockets. Decide how many you want and how big. My pockets are simple slip pockets but you can provide more space by cutting the pocket larger, pleating the bottom and adding elastic in a casing to the top. I like my pockets lined so I stitched two layers right-side together, turned and pressed. If I had been thinking at the time I would have laid the raw edges of the pocket along the raw bottom edges of the square and stitched them into the seam. But you can also fold the raw edge to the inside 1/2" and once more to make a smooth hem and then top-stitch the pocket to the square. You can add as many pockets as you like. I choose to just make four.


Next stitch your rows together and press seams open. Now you need to decide how this wall hanging will hang. I made loops out of the remaining fabric. You could use grommets or ribbon or make a rod pocket like for a curtain. Baste your hanging apparatus to the right side of the front piece. Lay your backing piece (cut to the same size as your assembled front piece) right sides together and stitch across the top.


Turn and press.


Finally, baste the raw edges together and bind. Make your own matching or coordinating binding if you have enough fabric or use store bought. 


Let me know if you have any questions.

This project has so much potential. I'd love to see pics of your finished projects.

Friday, July 29, 2011

Sewing Mistakes

Even the most talented sewers make mistakes. After all, we are human. Me, I make mistakes all the time. My motto is, "If I haven't had to rip out a seam and resewn it, I haven't sewed at all."

Today I serged part of a sleeve in with the seam. If I had just stitched it into the seam it wouldn't have been a big deal. But alas, sergers also cut fabric so the sleeve was left with a 2" slit in it. I zig-zagged over it and was grateful I hadn't used good or expensive fabric. You can't see it here because it's on the back of the sleeve. At least I won't have to see it.

I've made lots of mistakes; sizing, put zippers in the wrong seams, sewn things inside out because the right-side of the fabric looks like the wrong-side. That's why you have to be forgiving to be a sewer. I remember complimenting a friend one time on the decorative painting she did on her daughter's room. She said, "Well, it's just paint. I figured if we didn't like it we could paint back over it." That can be very true in sewing too. This top was supposed to be a tunic but the bottom is too narrow. So, I skipped the elastic at the midriff and figured I could wear it tucked in. Now I have altered the pattern to flare more at the hip for next time.

Other times, the mistakes were so unattractive that I just tossed it into the trash. After all, it's only fabric. I'll get some new and start over. "Tomorrow is another day."

Thanks Scarlett!

Tuesday, July 26, 2011

Back to School Sanitizer Carriers

An attractive way to carry hand sanitizer. Here is an easy tutorial to make these cute accessories. Attach them to their backpacks or carry on your purse. They can attach to anything the strap can get around. Make the strap longer and they can carry it around their neck. ha, ha, ha. Well, that might not be so funny during flu season.

Any woven fabric will work especially from your scrap pile. Choose a favorite print or for boys, use their favorite team fabric. Guess I'll be making one for Shawn out of Bulldog fabric.

All measurements are for the bottle I am using. You may need to adjust based on your bottle.

You will need:
-One piece fabric 6 1/2" x 4 1/2" cut on the fold (long edge on fold)
-One strip fabric 3" x 7" (longer if you want your strap longer)
-Elastic - I use foldover elastic but feel free instead to make a casing and use 1/8" to 1/4" elastic. This needs to be long enough to really snuggly wrap around your bottle.
-Magnetic snap or velcro, or if you prefer just to use a tie, cut two pieces 2" wide and however long you want your ties. Or, use a pretty ribbon.

1) Cut your fabric pieces.


2) Attach foldover elastic or stitch casing based on the width of your elastic and insert elastic taking at ends.


3) Skip this step if using ties. On strap fabric, install magnetic snap or stitch velcro pieces kitty-corner, measuring 1/2" from the edges.


4) Fold strap right sides together and stitch a 1/8th" seam down the long side. Turn right-side out and press.


5) Tuck remaining raw ends in and slip-stitch closed.


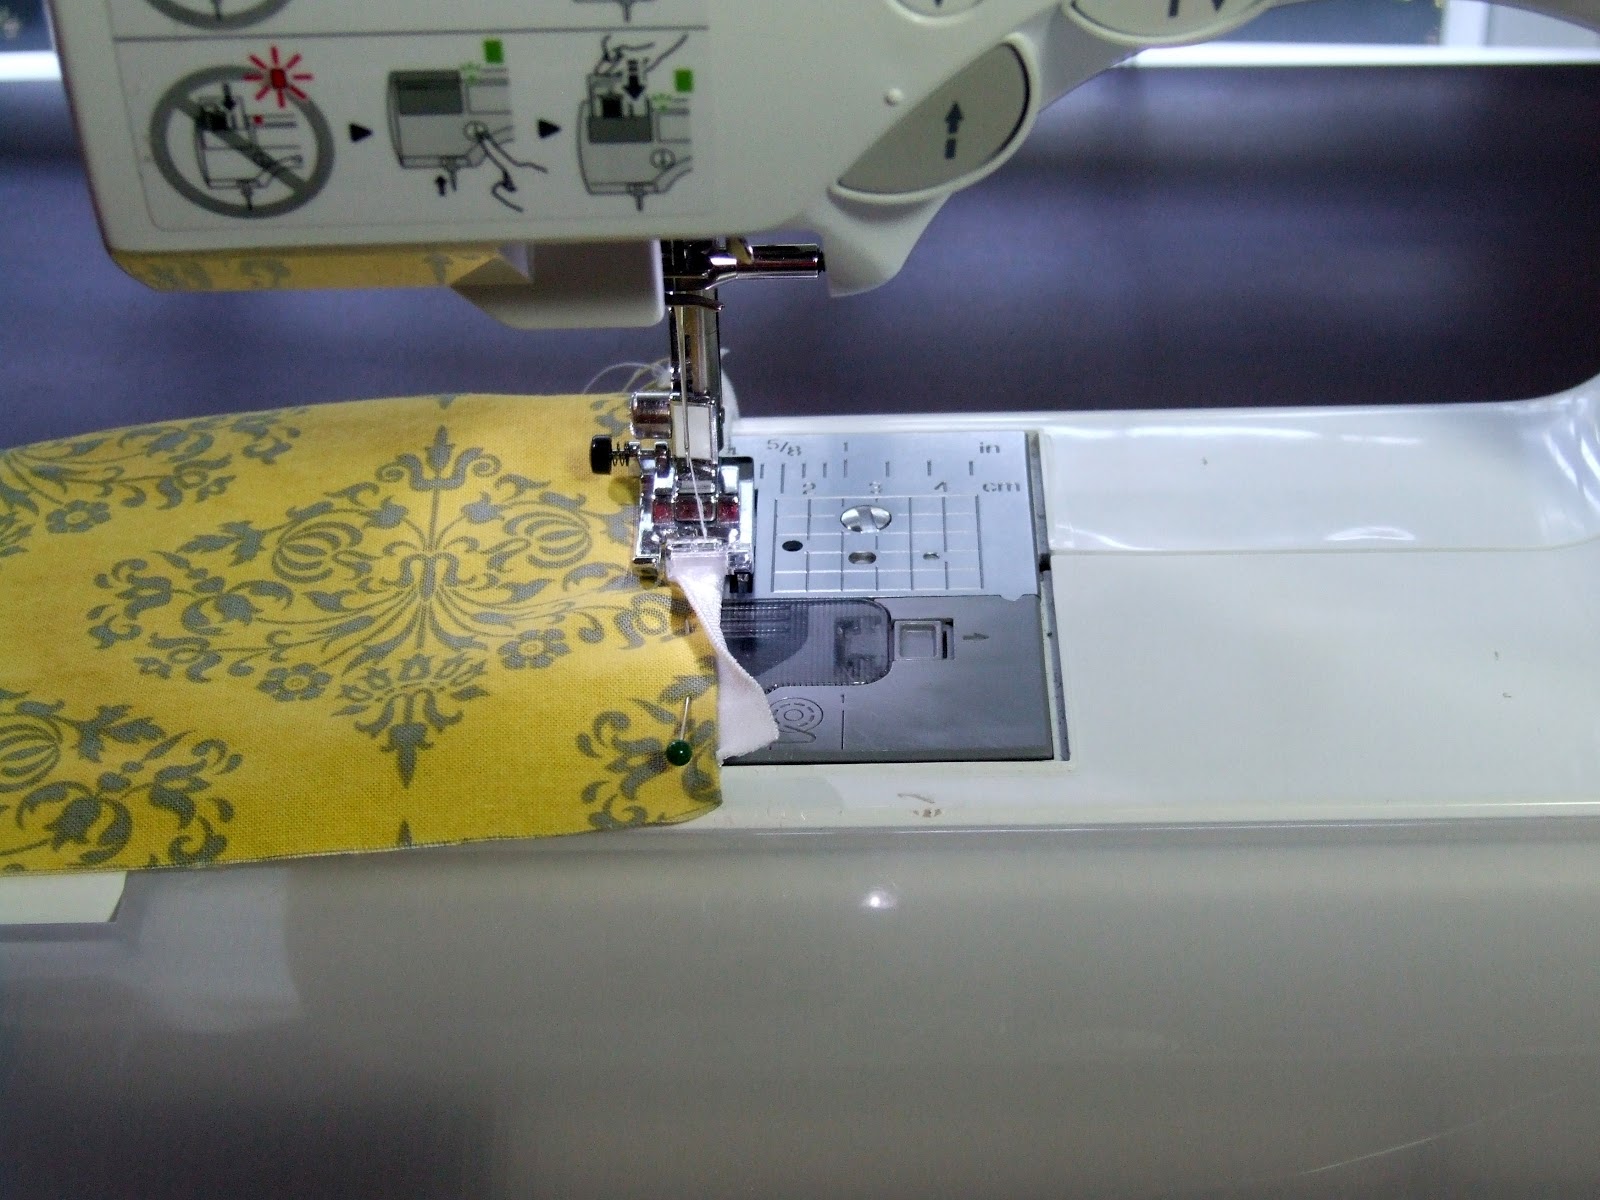
 6) Baste strap to one long, raw edge close to the elastic. This will be sandwiched and stitched between the side seam. Stitch closed long edge and finish edges if desired (serge or zig-zag).


7) Center seam in middle and stitch bottom closed. Finish seam if desired.


8) Optional: You can mitre the corners for a more boxy look. Simply flatten out a corner and stitch 1/4" from point. These are so small that if they are slightly imperfect it will be hardly noticeable.


There it is!

 But nothing is really finished in craft land until it is embellished, decorated or enhanced in some exciting way. So, I added a flower. I'll do that tutorial later but there are some out there already if you can't wait.


Finally, here it is on my bag.


Let me know if you have any questions and comments are always welcome!

Monday, July 25, 2011

Don't Fear Reupholstering

I am not a professional but I have recovered several dining room chair cushions. This project involved an antique chair that I inherited from my Grandfather who recently passed away. It was therefore very special to me so I was in a quandary as to who should do the work. I could have paid a professional between $325 and $500 to do this for me but I decided to take a chance and do it myself. The fabric cost $30 per yard so I was a bit hesitant. But I decided spend $60 and maybe screw it up instead of shelling out a minimum of $385 on the off chance that I would screw it up. Turned out to be a good decision. This isn't exactly a tutorial as I didn't take pictures all the way through but I will describe the steps in case you want to attempt this someday.

 Before                                                                                                           After
Here are some before and after shots to peak your interest.


 Tools you will need:
-staple gun and staples
-needle nose plyers
-flat head screw driver and any other screw driver needed to remove cushions
-small hammer
-bandages (ha, ha)
-enough fabric to cover the cushion and wrap underneath
-scissors

The first task is to remove the old fabric. No biggie, just unscrew, remove cushions and start prying up staples. The simplicity of this chair is that the fabric is on two removable cushions. Be very observant as you undo your chair and fabric. Take pictures if necessary so you can figure out how to reassemble the pieces and how the fabric should be applied. You are just copying the previous model.

Once that was done it was a matter of putting the fabric back on and stapling it in place. This chair needed three separate pieces of fabric. The seat and the front of the back cushion were recovered first. Because of the way this chair goes together, I needed the back of the back cushion open to reattach the cushion to the sides. Then for the back of the back, I carefully folded the edges in for a smooth finish and stapled in place. (Stretch and staple) Here are a couple of tutorials:
How to Reupholster a Chair
Classy Clutter: How to reupholster seat covers

I finished the edges with a coordinating gimp to cover staples and a few decorative upholstery nails since they kind of fit the era.

              Go on...Give it a try!!!

Sunday, July 24, 2011

Easiest Pillow Slipcover, Pillow Sham Tutorial Ever!

I found this great fabric that my girls just love. It's fuzzy and stretchy. Why do little girls love fuzzy so much? It makes me sneeze. But this is what we do for those we love.


 Anyway, most home dec fabrics come 54" wide which is plenty to wrap around a standard or queen size bed pillow. For a standard pillow, using this stretchy fabric, 1/2 yard of the fabric works perfect. For woven fabrics maybe get 3/4 to 1 yard and trim it back to fit.


Since we didn't cut off the selvage edges, we don't have to sew them but feel free if you want a more finished edge.


 With pillow laying on fabric, overlap long ends creating the envelope you need for a slipcover. Pin one side along the edges and pull out your model pillow from the other side. Now finish pinning the remaining side.


Simply stitch down the long raw edges. If you are using a fabric that frays easily or is fuzzy as in this case, you can finish the edges with a serger or zig-zag stitch.


Turn the cover inside out and stuff with pillow. You're done! Easy peasy.


And two very happy daughters!

Friday, July 22, 2011

Three outfits in one day Tutorial

Yep, I did that. But really, I'm not bragging.
Within one hour, I made three new outfits.
It's easy. First, I started with this dress.


Then I cut it in half. Using a cutting board, straight edge and rotary cutter makes this task especially easy and smooth.


For the top half I simply put in a 1/2" hem using a cover stitch machine. If you don't have a cover stitch machine, you can substitute an double needle. If your fabric is stretch, use a ball-point double needle. To make a straight hem from the front side of the fabric, I start with a 1/2" basting stitch along the edge to be hemmed. Be sure you are set for wide stitches because you are using this stitching line as a fold line and will be pulling it out after the hem is in.


Now you are ready to hem. With the fabric heading into the feeders right-side-up, fold the fabric under on the basting line you previously sewed. Continue till you are done, carefully pull out the basting stitch and now you have a new top.


For the bottom I used fold-over elastic. Awesome stuff. Here is a fold-over elastic tutorial for you reference. I probably should have taken the waist of the skirt in a little since it was originally down at the lower hips. I had to do a lot of stretching with the elastic to get it to fit. Just and FYI.

Here are my new outfits:


Thanks so much for visiting!

Thursday, July 21, 2011

Sewing Patterns

Let's start with patterns. They are one of the most intimidating aspects of sewing. Some brands are clear and concise while others are too concise. My favorite is Amy Butler. Her patterns are written for new sewers. By that I mean she completely describes the task. It's hard to misinterpret her directions. Also, in my opinion, her methods are easier than traditional ones. Beware though. This comes at a small price. When you open that pattern you will find paragraph after paragraph of directions. Don't let this stop you. The lack of white space means you are getting thorough information. Even experienced sewers can learn something from an Amy Butler pattern. Simplicity patterns are nice and even offer a line of "Sewing for Dummies", "Learn to sew" and "It's So Easy".

I always pull out the instructions and review them before buying a pattern. The envelope will tell you what level of experience is required but I like to see what tasks are going to be required of me. What kinds of zippers, how many pattern pieces, are there a million steps? One thing to remember as you grow in experience is that pattern instructions are not infallible. You can always change the way you sew a pattern. In fact, that can be fun. I often use a hidden zipper instead of the regular kind called for in many patterns. Also, there are a few different ways to sew in a zipper fly or set in sleeves. One time I mixed the top of one dress with the bottom of another. Use your judgment and get creative.

Post your comments on experiences you have had with different sewing pattern brands. I've actually sewn from a pattern that was missing steps. What about you? What are your favorites?